After hours of playing with mounting locations and options how to possibly mount it, I came up with a solution which shall allow to mount it, but also be able to replace it easily. In the left rear area behind the wheel well:
This time I will start with a picture of the final article, but the way to get here wasn't that easy!
With the decision of the location finalized, I had to find a way to mount it here. A bracket of 5 mm thick mild steel was the solution.
It is basically "L"-shaped, following the contour of the filter housing with a 2nd plate welded on, to accept the fixation points of the housing.

and this is the designated position of the bracket (positioned with my fingers only):

With 3 M8 screws attaching the filter to the bracket, it seemed only logical to use more than 3 bolts to mount the whole assembly to the body. So I used 4 M8 captive nuts to for a strong attachment set up:

Here is the sub-assembly of the bracket and filter housing, already attached with lock nuts:


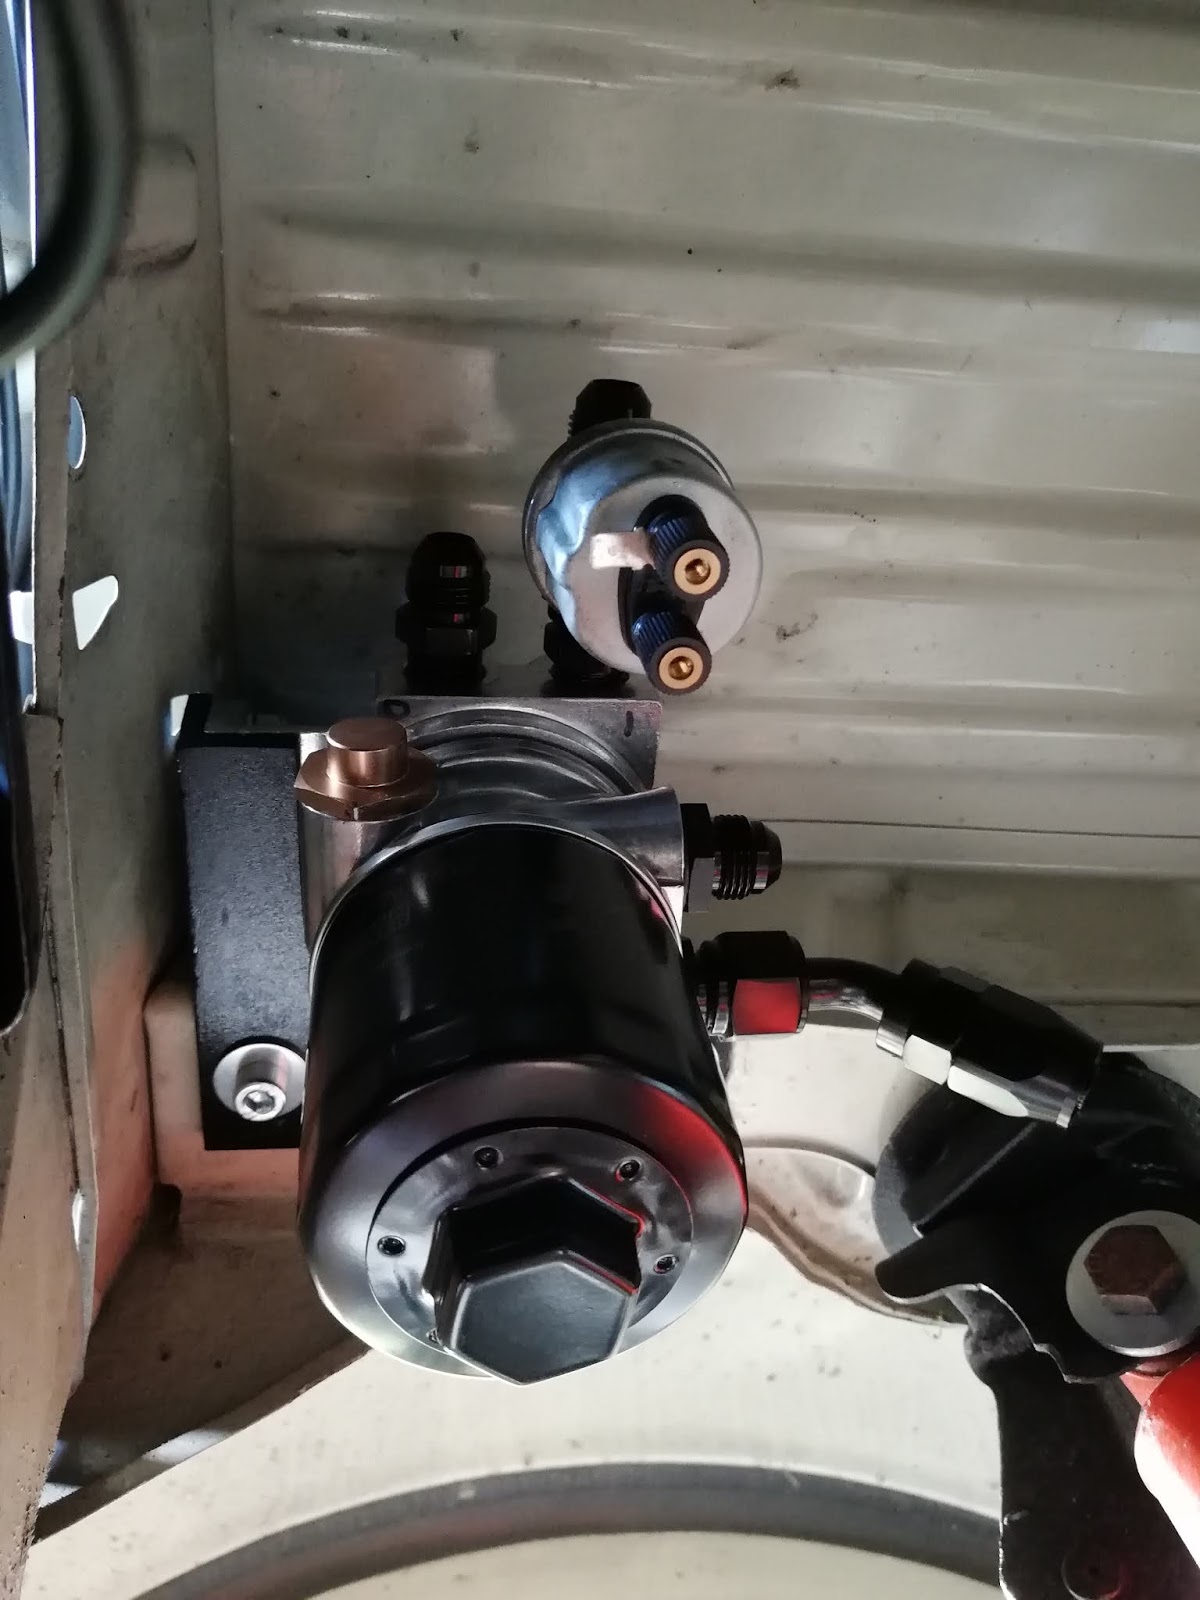
The oil pressure and warning light sender is also installed here, making the engine compartment a little neater with less cables. Oil hose routing is the next challenge!
Keine Kommentare:
Kommentar veröffentlichen